Post Apocalyptic Production Diary
"The Visual Narrative"
In the games industry it is common practice to keep a log of the process and in-depth developments that have taken place within each day of development. It is a great method to see how long the project took and overlook specific skills within the 3D Production Pipeline. This production diary is going to be used to keep a log of my production throughout each stage and will show how I dealt with problems during the development stages. In the Industry, production logs are kept for each project to keep teams updated on progress of the current project as they are very keen to make sure everything goes to schedule. I will be required to fill out a daily log of each day that I worked on this Visual Narrative. This maybe anything from modelling, additional planning, initial planning or environmental creation. Lets start off this project with the Unreal Engine:

The Start Of The Environment - Asset Packs
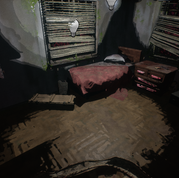
Before I rush straight into modelling and environment creation, the main "requirement" or crucial factor that goes into the mark scheme and environment formation is the utilisation of exploring the Unreal Market place and using a wide range of different asset packs. The main reasons for this is due to the unlikely time constraints and skill requirements to theoretically create a wide range of industry standard, professional grade models in such sort time. Regardless of this, it also makes environment design a bunch more fascinating and allows me to express a multitude of skills. This was the asset pack I received from my tutor:

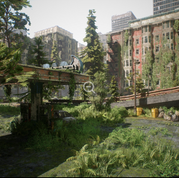
There are a few other asset packs used within my specialist toolkit to create this project, however they will be later documented within the project, as it gives me the chance to explain more in-depth. To get started with my project, I went ahead and started to fabricate some concept art schematics for the Level Design, with reference to my Research previously. This work can be seen below in the Moodboards.
World Building / "Map Making"

Unreal Engine - Landscape Development
Now it is time for the most important and crucial stage to begin, the fabrication of my digital environment. As stated above, I will be using various amounts of assets from pre-made, professional asset packs made by other artists, but will also be modelling and producing assets to call my own. To start this stage off, I installed the asset pack into my content folder and started off sculpting a landscape within Unreal. Throughout each documented Moodboard, will span the entire "Production" Stage from the Game Production Pipeline, including examples like, blocking, lighting, post processing, sculpting, etc.
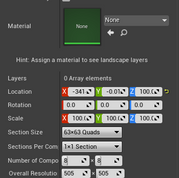
To summarise the Moodboard above, this was the starting fabrication and an important stage where I dived deep within the given, required asset pack to use. In doing this, I used my previous knowledge of material creation and decided to open up the previous material and alter the custom values, this goes into more depth above but the end product was something that looked quite professional. Not only this, but I strictly followed the 3D Landscape Production Pipeline and thoroughly sculpted the landscape from a simple 2D drawn concept. Not only did I use the traditional sculpting methods with simple tools and customising them, I also decided to add in some alpha brushes for those more detailed and in-depth surfaces. By using the landscape material that came with the asset pack, I learnt the importance of understanding not only how to potentially make the material myself, but having the ability to decompose each crucial attribute and being able to alter specific values to benefit me.

As shown above, comes the next crucial and significant stage in regards to digital landscape development: "Blocking/Blockout" or creating a scene called a "Blockmesh". Blockout or Blocking is a process where you use primitive geometric shapes such as cubes, spheres, cylinders, planes, etc, to block-in my level designs. These were the types of concepts that I had to consider when initially designing and conceptualising my landscape environment:
Massing: This is the general sense of volume and weight conveyed by the shapes.
-
Is this structure thick / heavy, or thin / light? What kind of place is this?
-
Composition, is the environment currently too dense? Is it balanced?
Metrics: are the general scale, dimensions, and proportions of the level.
-
Is this area too big or small? Can the player fit in this room?
Lighting: heavily affects how players perceive shape, depth, space, and mood.
-
How to help the player find the critical path / level exit? Does the player feel too lost? Is the environment too bright?
Wayfinding: is the player's navigation process for learning the map structure.
-
Can most players complete the level? Do the encounters work? Is it balanced?
-
Playtesting is really important. This is the whole point of making a blockout.
Playtesting: is when you run an experiment to see if the level meets its design goals.
-
Can most players complete the level? Do the encounters work? Is it balanced?
-
Playtesting is really important. This is the whole point of making a blockout
By taking all of this information in and by researching the small details of "how to make a successful landscape", I referred to my research and created a borderline, "playable" landscape. But it lacked things like advanced lighting, props, and just general depth and lacked the explorative adventure when deciphering such a unique game genre (post apocalypse).

After the blocking process, it was time I added in some foliage assets. Within the Post Apocalyptic asset pack, I found that there were a wide plethora of modular plant assets. This includes 10 unique types of trees, 20 different rock assets in varying sizes, 26 different types of small plants such as ferns, lilies, vines and leaves. If combined together and utilised in such a way that impacts the visual experience, this is important. I went around the map simply dotting various types of plants either in single intervals, or by carefully adjusting the foliage painting tool by altering how dense each model will be. As shown above, I worked around each building, ensuring I wasn't overpopulating the scene. Due to the player being unable to venture to the higher ground, they are limited to a constricted valley, with only the slight view of houses on the hills. This was a technique that is called _ it essentially means that I limit the player's view which allows me to create the illusion that there is a vast environment in the distance, spanning over a large distance. A scene without the proper amount of foliage leaves the environment not looking appealing at all and leaves the player to get potentially lost and not understand what type of environment they are supposed to be in

In this stage of my production diary, this is when I start to slowly transform and mould my environment into a somewhat playable scene, however at this moment in time, to achieve the highly sought after "Distinction" Grade, I had to still plan out and and iterate my scene accordingly, rushing and not taking attention to important sculpting detail, can lead to a scene that does not flow freely and can cause a lack to interest to not only the surroundings but allow the viewer to lose important attention. So, to start off the next "Production" stage from the 3D production pipeline, I utilised the wide range of pre-assembled blueprints that I deleted all of the smaller assets within and replaced the blocked primitives with. After that was complete, there was quite a few issues in regards to the landscape structure and some foliage assets that I used too frequently. In the moodboard above, you can see the process of me tailoring the landscape's voxels to each building and add in some extra paint layers here and there to make them more aesthetically appealing. Not only this, but I went around the scene cleaning up some stray foliage assets that were either floating to needed a revision due to them overlapping with certain buildings.

Unreal Engine - Lighting / Fog - Skyboxes
Now it is time for the most important and crucial stage to begin, the fabrication of my digital environment. As stated above, I will be using various amounts of assets from pre-made, professional asset packs made by other artists, but will also be modelling and producing assets to call my own. To start this stage off, I installed the asset pack into

Unreal Engine - Lighting - Cel Shaders - Props - Final Touches
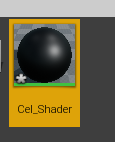
Now comes in one of the most important and technical stages of my entire project. Within this category, I not only created something called a "Custom Cel-Shader". Cel shading or toon shading as it is called, is a type of non-photorealistic rendering used within various mediums of 3D modelling and level design. They usually appear to be flat by using less shading colour instead of a shade gradient or tints and shades. A cel shader is often used to mimic the style of a comic book or cartoon, hence the "Toon" name. As shown below, I show to process of the development of the shader and I go in-depth each component as they are crucial in the industry if working as a technical, shader, environmental or 3D artist. Not only this, but I alter the scene's entire lighting rig including directional lights, skyboxes and a various amount of postprocessing within the Cel-Shader and the scene. Not only this, but I add in scene props and other smaller lighting fixtures.
Now it is time for the most important and crucial stage to begin, the fabrication of my digital environment. As stated above, I will be using various amounts of assets from pre-made, professional asset packs made by other artists, but will also be modelling and producing assets to call my own. To start this stage off, I installed the asset pack into
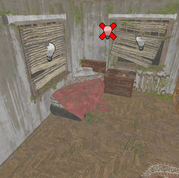
As shown above, this was one of the last areas within the entire environment that I decided to leave last. In reference to my world plan schematic form the beginning pre-production stage, this building serves as the
Software Used


Evaluation
Simply put, for me to get started on this short project, I was given a short brief from my tutor. "To create a race vehicle and 2+ background assets or concepts for a racing game that made players think about the environment in some way." So, have I actually achieved what I was set to do? Some may look at the development on each model using the correct modelling pipeline and say that I have gone further than expected to, which on it's own excludes other main attributes of the project such as the fully sculpted topography of a fictional landscape including various quantities of hidden art techniques, or it could be the HUD that was designed within a digital art software and made fully functional with custom parameters and interactivity. More on this below:


