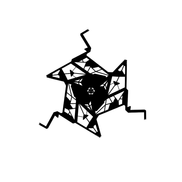
Eco Racer Production Diary
By Daniel Curley
In the games industry it is common practice to keep a log of what has been done each day and is a great method to see how long the project took. This production diary is going to be used to keep a log of my planning throughout each stage and will show how I dealt with problems during the development stages. In the Industry, production logs are kept for each project to keep managers updated on progress of the current project as they are very keen to make sure everything goes to schedule. I will be required to fill out a daily log of each day that I worked on this Sci-Fi Racer. This maybe anything from concept art, additional planning, initial planning or asset creation. Lets start off this project with my FMP Proposal and timeline:

Concept art - Pre Production (Days 1-7)
This was the starting point of the main asset piece, the player's vehicle, this was where I was tasked with designing and producing a series of concepts to serve as the base of my vehicle. Starting out, it was important for me to make some smaller, less sophisticated designs to see what types of feedback I receive from my peers. Once the silhouettes were established, I proceeded to assemble a detailed version of a specific design, building on the concept idea that I want to perceive.
Race Ship Initial Ideas Moodboard
Here was the Moodboard I created to gain some insight to how vehicles were made in the Sci-Fi genre.

After I gathered enough references from concepts such as these above, I analysed each of the ship's structural design and produced 9 Silhouettes, these can be seen below. The importance of these concepts allows me to refine and develop specific ideas to ensure my creativity isn't bottle necked to just one abstraction.

Concept after concept, ensuring I was using the correct shape language within each piece, therefore allowing me to communicate meaning based on shapes we are familiar with. When used in the sci-fi genre, and relating to my research, I had to use a form of Geometric shapes. These are the basic shape structure that is most commonly used within the genre, keeping to these specific shape structures enabled me to portray a vehicle and it's potential use/harm in which gives the viewer an insight to what my directives are. As an example you can see within each concept what shape I am using, within sci-fi, rectangular, blocky shapes are most commonly used, but if done correctly you can use shapes such as circles and triangles.
When looking at Sci-Fi concepts and understanding the fundamentals that went into creating one, I noticed they often have symmetry and contain a structured look and feel with sharp edges and angles. Rather than something like abstract shapes, which are simplified forms distinct from being Organic or Geometric. These are often combinations of the two, but I decided to stick with simple more basic shapes as this will help within the modelling. In designs there are predominant, more primary uses of the geometric shape language which does serve as a structural and unique design, this also allows to me link certain more triangular designs with colour theories to portray certain things. I have used these shapes in order to show personality, and illicit an emotional response in the viewer without using any words or extra features that instantly spell out what im trying to illustrate.
Here was the processes I used to create each thumbnail concepts:
The base repeating technique that I used to design each concept was by using a type of symmetry called Reflection Symmetry, another skill that is utilised when designing concepts, this allowed me to draft basic shapes and start to mould only one half, which would then formulating my vehicular designs in real-time, this not only allowed me to save a considerable amount of time drawing, but also helps when preparing to model.

These were all of the types of symmetry that I could utilise and had a crucial impact on my composition. The most common symmetry type used for this section was the Horizontal line.

As you can see when I was designing each individual ship, I had multiple symmetry lines that were used to depict each concept. In the layers I also decided to merge all the ship layers into one, this was to keep the hierarchy clean and organised, this also helped when documenting and exporting.


For designing each concept design, I simply used a default hard round brush pre-set with an opacity of 100% and smoothness value of 10%, this gave the silhouettes a flush, cartoonish look to them.
This was one half of my example concepts with the symmetry line put in place, this screenshot shows that I only had to draw up one half, of each design.
These weren't the only silhouettes that I designed. Only difference this time was that this was an experiment and was a demonstration of how different types of symmetry can change the whole outlook on my sci-fi designs. These were going to originally be the basis of my ship, but shortly ended as I simply couldn't do much with them aside from developing to a more complex design, hence why I kept to the classic horizontal symmetry:

To create these more simpler sets of silhouettes, I managed to use 4 sets of symmetry, the same brushes were used just like the previous sets of 9. The difference with these first sets of silhouettes were that these were without references or anything that could influence my ideas, these sets of silhouettes were purely by my creativity and nothing else. The symmetries used were as follows:

Vertical
Horizontal
Radial
Mandala
When looking through my concepts, I decided to go with a design that I thought had the most potential when relating to my brief. The shape language was triangular and sharp, which leads me to tie in colour theory fundamentals such as utilising "Evil Colours" like Blacks. I had so many ideas relative to my racer prompts explaining the vehicle's inefficient use of fuel, and the referencing back to the ecological topic of this project. I find that silhouettes are a powerful tool to use as the human eye is extremely good at spotting things based upon their silhouette. I use the power of silhouettes at the beginning of a design prompt as it can help with a linear creative process and allows for a fast workflow to developing ideas, due to them not requiring any details. This was the process of the basic and advanced draft below:


With this design I was going for a top down view again, it has some added values onto it in order so that I could focus on purely the depth and structure. Regarding the skills used to create this, I still used pretty Basic Drawing Skills, but also had to organise some more important layers including some detail Layer Masks. This concept isn't the final design so I only added a few areas containing bounce light and kept with a neutral background in order to build on that depth, and finally adding Layer Styles such as chamfers and inner/outer shadows.
Finally, I took this advanced top down piece and was tasked with creating a piece similar of a professional digital art concept. My task was to turn a developed, top-down view of a silhouette, sprung from diverse research, possessing a solidified thought path and creating a piece that would resemble my vehicle within a virtual 3d space. This stage was baffling to me as we had to use something called Two-Point Perspectives. Perspective in art can be used to refer my representation of three-dimensional objects or spaces in two dimensional artworks. In this piece, I have used perspective techniques to create a realistic impression of depth in which I had the idea to use this as a moment to demonstrate my concept and idea through this artwork.
I have used a form of Linear perspective to structure the composition, it definitely had to include a horizon line to determine how much my object's apparent size changes with distance. This deals with how the appearance of the ship is affected by the surrounding space between it and the viewer. Below is the concept and evaluation that I had to complete for this segment.
Final Racer Concept Piece - Evaluation Doc
Link

The great thing about using silhouettes for designing game assets and using them to create a final piece, is how im able to refine them with something called values within each stage, they are basically what you see when you convert an image with colour to a grayscale image. By painting in the values to each silhouette design I was able to focus on the depth and structure. It also helps with emphasising project development and can be evident in showing off skillsets as an advanced artist. They allow for the slow construction and can be generally less daunting. Now that my ship concept was full-fledged out and complete, it was time to start with the 3D construction.

Maya Modelling/Texturing - Production (Days 8-19)
It was at this stage where im in the "Production" part of the 3D Production Pipeline. Now that I have a main concept for my Player's ship, it was time to create the first 3D Model of the project.
This was the production process of the player's ship from concept art, click each image within the Moodboard for each detailed step:

Once I had the very basics of a Sci-Fi ship model with all of it's UV shells intact and prepared for Texturing, I exported the model into a. FBX file type then proceeded to import it into Adobe Substance 3D Painter, this is a texturing app used for both 3D professionals and enthusiasts. I had to be confident in what I made within Maya as if there are any problems regarding topology/UV's, attributes like materials/textures wont tile properly and will look incorrect, which in turn will ruin the aesthetic. To ensure this would work, I simply deleted the history and prepared to get it into substance. Once acquiring a student license for me to use, I imported the file in which left me with the substance process grid below:

Wonderful, I gathered all of the Texture maps that I just created and explained above, to now prepare myself for the unreal engine, rendering and showcasing. My next step was to go and do the same thing for 2 other background assets. Earlier before this project started I was tasked to create a LEGO themed ship that was going to be simply going to be used as a background asset. Everything related to the construction, planning, production etc can be found by pressing these links below:
In those links above, they include a production diary and all information relative to how I textured each asset and turned the final product into a professional, rendered showcase.
Leaving the LEGO ship for now, I started to model my last background asset, which will serve as the ship that flies over the racetrack and surveys the landscape. This again just like the main vehicle was created using the same skills in Maya, but was quite more extensive regarding the amount of mesh I had to model and what I needed to do to make it aesthetically pleasing and look like a professional model. The modelling process can be seen below:
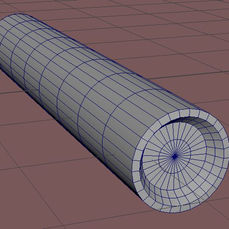
Similar process as before, I sorted all of the UVs for each modular asset and sent it all into substance 3D Painter to prepare some more Texture maps to spruce it up and make it look like its meant to be in the game. This process was the exact same as before so I won't document as much this time.

So now that It has all been textured correctly with a series of Texture maps, I decided to put it straight into Unreal Engine in which I will set it up for the scene.
Sketchfab Links
Below are some Sketchfab links to all of my assets made within Maya and textured within substance, the rest of the renders will be at the bottom of this production diary.
Unreal Engine - Production (Days 20-33)
Everything related to the asset creation including the main player vehicle and 2 background assets has now been completed with their own relative meshes and all contain precise and stunning, custom texture maps that have been hand painted. It now the time to make use of everything that I have made so far and bring it to life in a virtual 3D world. In order to call this a game, I have set out to make an immersive Landscape, fully sculpted by hand following the correct pipeline for doing so. Turning a first person "pre-set" template player controller into an innovative and customised ship design. Importing and applying mesh with their relative textures and creating custom materials within the engine to apply and tweak settings. Creating a fully-fledged interactive HUD with working damage systems and speed increases, including a realistic, Sci-Fi style speedometer represented both by a circular representation and a factual velocity count. Importing background music and SFX.
To start making the HUD, I started within Photoshop, with all the research completed, I was confident in the concept idea and started creating something as simple as a health bar. When it comes to manually designing this, with references of course, I have had no experience in this before, but I do know the crucial components when it comes to layer organisations and certain settings to add things that enhance appearance. The most common being as Bevel&Emboss, Inner Shadow and Drop Shadow. This entire process including the speedometer can be seen within the gallery below:
Health Bar

The same exact processes were used to create the Stamina Bar also.
Stamina Bar

Speedometer / Gauge
When it came to the speedometer that you will see within the game, there are a few more layers within the photoshop scene when compared to the other two bars, but the fundamentals stay the same, no matter what shape. The process of making and adding visual FX all documented below:
Panel Asset FX

Centre Asset FX

Outline Asset FX
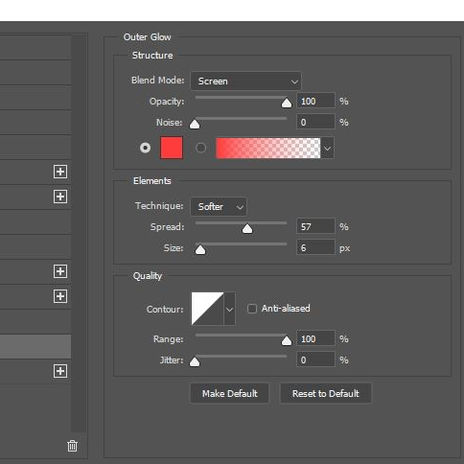
Background Asset FX


These were all of my Layers within Photoshop, they are organised correctly in order for the shadows and outlines to blend properly. The assets were all exported as PNGs otherwise they wouldn't have been able to overlap and function as intended
This is what the individual assets looked like within the Photoshop scene:

And this is what the exported assets look like:

And finally, combine this all together and you get the finished Speedometer asset. One thing to note is how I am lacking with a filler asset that would resemble the value of speed from 0-1. In order to create such a complex and dynamic shape, I would have to create a parent material that generates a circle, very similar to what I want my progress filler to be, then creating dynamic, public values in a material instance that can be edited down to have starting/ending points. Here are all the speedometer assets put together:


To summarise, instead of using a traditional linear progress bar, I decided to go for a more circular design. This, in photoshop consisted of 4 layers, the background shadow, outline, center piece and the plate for the numerical values. These were assorted in order to allow things like outlines and shadows to function properly, the main reason for this however was to prepare for Unreal and it's complicated ways in regards to circular progress bars.
Interactive HUD production - Unreal
Now that everything related to the creation and finalisation of the HUD assets is now complete and all organised separately in their relative folders, I am now going to give them a purpose and put them within my game scene alongside my 3D meshes. I started by importing these into Unreal engine. This entire process is also documented below within the gallery.

The next step in store is to actually make the HUD interactive and dynamically change in regards to the actions of the player and it's environment. I started this technical stage within the First Person Character blueprint where I went through the process of making the Health and Stamina functional with "sprint/boost" and even making a simple damage system to test if everything works. :

The last segment left to finalise this stage within Unreal would be to make the speedometer fully functional combined with a numerical counterpart. My objective is for both the counter and circular gauge to work in harmony and dynamically change in regards to the actions of the player and it's velocity/speed. I started this technical stage within the content browser where I went through the process of making the speedometer material and making it fully functional:

And thats it, the full process making an entire video game HUD just from some simple shapes in photoshop and evolving them into an interactive and quite impressive set of Sci-Fi assets. This was by far the most intense and extensive segment within my entire project. Its such a shame how unconvincing and simple the speedometer may be perceived to be by some people when looked at from a perspective. If something works as intended and doesn't serve much importance other than it's cosmetic attributes, to me I think it would be overlooked if I asked the player what they think took the longest to develop. This in turn has made me respect and enquire on professional work to a great extent when examining their work.
Sculpting Sci-Fi Style Environments- Unreal
As said before during the introduction to this segment, I have set out to hand sculpt an immersive environment that comfortably fits within the Sci-Fi genre. I will be following the appropriate 3D sculpting production pipeline when designing using Unreal's landscape capabilities. This process can be seen below:
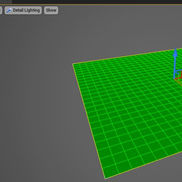
So now that the environment for the Player has now been established, I now needed to add in my assets into the scene view along with all of their relative Textures. This was that process below:
Lego Vehicle Textures

Player Vehicle Textures
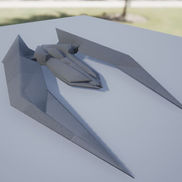
Survey Vehicle Textures
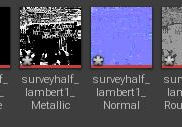
Customising Character Blueprints
Once all meshes and textures were applied and working functionally, one of the final steps was to implement a mesh in-front of the first person's camera to create the illusion how there will be a ship in view. After this I also tweaked some post processing settings and the lighting within the scene, both of these processes can be seen here:


Renders / Showcases (Days 34-37)
And thats it, the entire process from Photoshop, to Maya, Substance then all combined and mashed together to form this small scene within Unreal. Everything has been added into the engine, including interactive features and have been refined with multiple types of Post processing and lighting settings. The last and final segment includes me doing some extra renders of the assets and a final showcase.
Lego Ship
As I said earlier, the LEGO themed ship that was used as a background asset, everything relative to the construction, planning, production showcases and renders can be found by pressing these links below:
Player Ship/Main Ship
All of these renders were created within a real-time rendering toolkit called Marmoset Toolbag is a software that offers digital artists the ability to see their 3D models in real time and animate with ease.

These renders weren't as complicated as I first imagined them to be. The process is very similar to Sketchfab but is much more in-depth. I started out simply importing in my model and aligned the main camera to the correct position. I then added a "render component" which relates to everything that includes, de-noising, compression, camera attributes, shadows, occlusion, image/video directory and altering light ray samples.

The images above were two different styles of digital art for this ship concept. They were both made from a render from marmoset toolbag to then being transformed by painting over it within photoshop and changing things like the levels, contrast and brightness, while adding things such as gaussian blur and layer styles such as outer glows.
Survey Ship/Background Ship


